How To Cook Aglio E Olio In 15 Minutes: A Fast Garlic And Olive Oil Pasta Guide
It is 6:40 p.m. on a Tuesday, the fridge is thin, and you have a head of garlic, a bottle of olive oil and a box of pasta. Aglio e olio is the dish that...
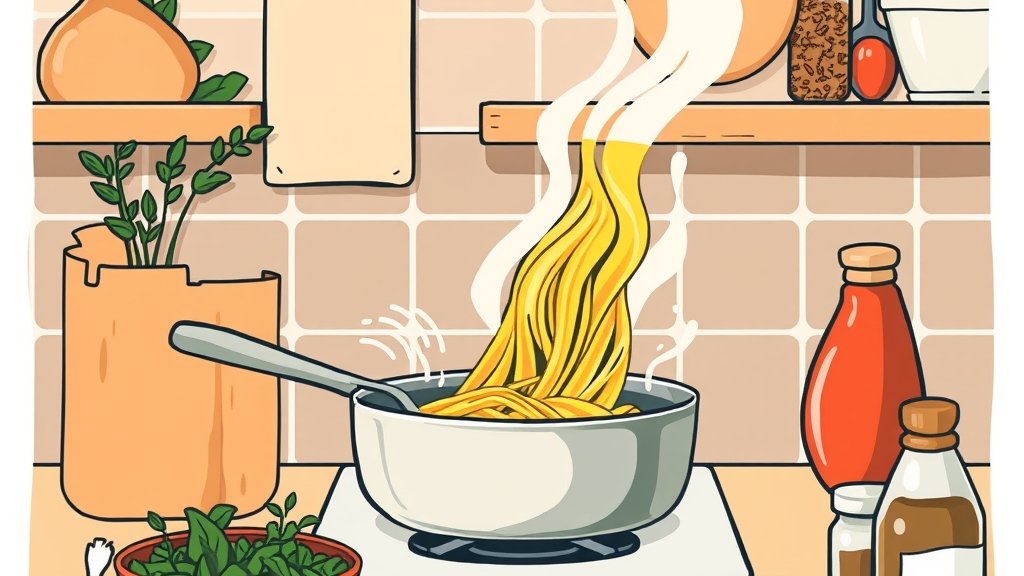
It is 6:40 p.m. on a Tuesday, the fridge is thin, and you have a head of garlic, a bottle of olive oil and a box of pasta. Aglio e olio is the dish that fits that moment.
It is a garlic-and-olive-oil pasta, a pantry staple in southern Italy, and it lives or dies on two things: how you treat the garlic and whether you build an emulsion.
The 15-minute target is real, but read it honestly. The clock starts once the water is at a full boil, not when you walk into the kitchen. A large pot can take 5 to 10 minutes to get there, depending on volume and your heat source. Start the water first, before you touch the garlic, and the rest fits.
Most home versions go wrong in one of two directions. Either the garlic browns and turns acrid, or the drained pasta meets oil with nothing to bind them, so the sauce sits on top and the plate tastes greasy. Both are timing problems more than skill problems, and both are fixable once you know what you are watching for.
The dish has only a handful of components, so each one carries weight. Fresh garlic and a decent olive oil do most of the flavor work here. There is nowhere for a tired clove or a flat oil to hide, which is why ingredient quality matters more than any trick in the pan.
What follows is a minute-by-minute sequence, with the reason behind each step before the step itself. You will slice rather than crush, warm rather than fry, and reserve water before you drain. None of it is restaurant technique. It is just the order that keeps the garlic pale and the sauce glossy.
()
The Clock Starts When The Water Boils
Fill your largest pot about two-thirds full and set it over high heat before you do anything else. Volume is the variable that matters: a wide pot with more surface area reaches a boil faster than a tall, narrow one with the same amount of water. Put the lid on. It traps heat and shaves minutes off the wait.
While the water heats, salt it. The water should taste seasoned, like a light broth, because this is the only chance you get to season the pasta itself. Pasta absorbs salt from the water as it cooks, and no amount of finishing salt later reaches the inside of the strand. Salt early so it dissolves fully.
Now the honest part about the 15 minutes. The time to bring a pot of water to a full boil, often 5 to 10 minutes depending on volume and heat source, sits outside the target. If you count from a cold pot, you are looking at closer to 25 minutes. That is not a failure of the method; it is just physics.
So the practical move is to start the water, then walk away and prep. Slice the garlic, set out the oil, chop the parsley if you are using it. By the time the water is rolling, everything else is ready and the actual cooking window is genuinely short. The 15 minutes is cooking time, not waiting time.
A full rolling boil, not a lazy simmer, is what you want when the pasta goes in. A vigorous boil keeps the strands moving so they do not clump, and it keeps the water temperature from dropping too far when you add cold pasta. Stir in the first 30 seconds to separate the pieces.
Do not oil the water. It does nothing for the pasta and can make the surface slick, which works against the sauce later. The starch on the pasta surface is your friend; you want it there to help the oil and water come together in the pan.
One more check before the pasta goes in: is the pot big enough? Pasta needs room to move. Crammed into a small pot, it cooks unevenly and releases starch into a small volume of water, which turns gluey. If your only pot is small, cook in two batches.
Key points
- Start the water before anything else and lid the pot.
- Salt the water until it tastes seasoned; this seasons the pasta itself.
- The 15-minute clock starts at a full boil, not at a cold pot.
- Use the biggest pot you have so the pasta can move freely.
Slicing Garlic Instead Of Crushing It
Crushing a clove ruptures far more of its cells than slicing does, and that releases more of the pungent compounds that turn sharp and acrid under heat. Slicing keeps the pieces intact, so they warm gently and give up flavor slowly. The difference in the pan is not subtle.
Slice the cloves thinly, crosswise, about the thickness of a coin. If a clove has a green shoot running through the middle, split it and pull the shoot out; it tastes harsh and raw. Trim the dry root end too. Small prep, but it shows up in the finished plate.
Freshness matters more here than in most dishes, because garlic is half the flavor. A clove that is soft, sprouting or hollow has lost the sweetness you are relying on. Press a clove with your thumb; it should feel firm and heavy. If it gives, use more cloves to compensate.
You do not need a mandoline or any gadget. A sharp knife and a steady hand will do it, and the slices do not need to be uniform to the millimeter. Slightly uneven slices are fine; what matters is that none of them are thick enough to stay raw in the middle while the edges color.
Keep the sliced garlic in a small pile and do not let it sit in a wet bowl. Moisture on the slices makes them spit and steam when they hit the oil, which slows the gentle warming you are after. Pat them dry if you rinsed the cloves.
If you are adding chili flakes, have them measured and within reach now. They go into the warm oil with the garlic, and you do not want to be hunting through a cupboard while the pan is live. Same for the parsley, chopped and waiting on the board.
The one thing to resist is the shortcut of crushing the garlic into a paste. It feels faster and it does spread through the oil, but it also burns in seconds and turns the whole dish bitter. Slicing is the slower-looking move that actually protects you.
Key points
- Crushing releases more pungent compounds that turn acrid under heat.
- Slice thinly and crosswise; discard any green shoot and the dry root.
- Use firm, heavy cloves, since garlic carries half the flavor.
- Have chili flakes and parsley ready before the pan goes on.
Warming Garlic Without Browning It
Put the sliced garlic into cold olive oil in a cold pan, then set it over low to medium-low heat. Starting cold is the trick: the garlic and oil heat together, so the garlic warms gradually from the inside out instead of searing the moment it touches hot fat. This is the single most useful habit in the dish.
Stir often. The slices should move around the pan so no single piece sits against the hot metal long enough to scorch. You are looking for a gentle simmer at the edges of the slices, a few small bubbles, not a furious sizzle. If it is loud, turn the heat down.
Watch for the cue: the garlic turns pale gold and smells sweet and fragrant, not sharp. That is your signal to move. The window between pale gold and brown is short, maybe 30 seconds on a hot pan. Pull the pan off the heat the moment the color shifts.
Browning is the most common failure point in aglio e olio, and it is worth understanding why. Garlic contains sugars and amino acids that react under heat to create bitter compounds. Once that happens, no amount of pasta water or parsley covers it. You cannot rescue a burnt pan; you start again.
If the garlic does start to color too fast, lift the pan off the heat immediately and add a splash of cold pasta water. It drops the temperature and stops the reaction. Then lower the flame before you continue. A pan that is too hot is the usual culprit.
How long does this take? Roughly 2 to 3 minutes over low heat for a small pan of sliced garlic. It depends on your burner, your pan thickness and how cold the oil started. Trust the color and the smell over the clock, because those are the cues that tell you the truth.
Thin pans heat unevenly and hot spots scorch garlic in one place while the rest stays pale. A heavier pan spreads the heat better. If yours is thin, keep the flame lower and stir more. This is one place where the equipment genuinely changes the method.
Key points
- Start garlic in cold oil over low heat so it warms gradually.
- Stir often and keep the heat at a gentle simmer, not a sizzle.
- Pull the pan when the garlic is pale gold and fragrant.
- Browning turns garlic bitter; a splash of cold water stops it.
The Starchy Water That Makes The Sauce
Before you drain the pasta, scoop out at least a cup of the cooking water and set it aside. This is the step people skip, and it is the one that decides whether you get a sauce or a puddle of oil. The water is cloudy and slightly thickened from the starch the pasta has released.
That starch is what does the work. Oil and water do not mix on their own; they separate. Starch acts as an emulsifier, holding tiny droplets of oil suspended in the water so the two form a creamy, glossy liquid instead of splitting. The pasta water is the emulsifier, not a thinning agent.
Here is the mechanism in plain terms. As you toss the pasta with the oil and a splash of the starchy water, the agitation breaks the oil into tiny droplets. The starch coats those droplets and keeps them from merging back together. That is the emulsion, and it is what clings to every strand.
Add the water a splash at a time, not all at once. Too much and you have soup; too little and the oil never comes together. Start with a couple of tablespoons, toss hard, and look at the pan. If the sauce looks tight and dry, add another splash.
The tossing is as important as the water. Stir or toss vigorously for 30 to 60 seconds so the pasta, oil and water are forced together. A gentle fold will not do it. You want the pasta moving against itself, which is what breaks the oil into droplets in the first place.
The cue that you are there: the sauce turns opaque, creamy and glossy, and it coats the back of a spoon. If it looks oily and separated, you need more starchy water and more tossing. If it looks watery, keep tossing over low heat so it reduces slightly.
Save more water than you think you need. You can always add it, but once it is down the drain it is gone. A second cup in a mug beside the stove costs nothing and saves the dish if the pan runs dry.
Key points
- Reserve at least a cup of cloudy pasta water before draining.
- Starch in the water is the emulsifier that binds oil to liquid.
- Add water a splash at a time and toss hard to build the emulsion.
- The sauce is ready when it turns glossy and coats a spoon.
Tossing Pasta, Oil And Water Into A Sauce
Drain the pasta but do not rinse it. Rinsing washes off the surface starch you just spent ten minutes creating, and that starch is what the sauce needs to grip. Shake the colander once to lose the loose water, then tip the pasta straight into the pan of warm garlic and oil.
Do this off the heat, or over the lowest flame. The pan already holds hot oil and garlic; the pasta brings its own heat. You are combining, not cooking hard. If the pan is too hot, the water flashes off before it can do its job and the sauce tightens before it forms.
Now add the first splash of pasta water and toss. Use tongs or two forks and keep the pasta moving. The goal is to coat every strand, and that only happens with movement. Thirty seconds of real tossing does more than a minute of gentle stirring.
If you are cooking a long shape, tongs work well; for short shapes, a wooden spoon or a quick circular shake of the pan is better. Either way, the pasta should be moving against the sides of the pan, not sitting still in the oil.
Taste before you serve. The pasta should taste seasoned through, because the salted water did its job. If it tastes flat, a small pinch of salt in the pan now will help, but go carefully; you can add salt, not take it away. A grind of pepper is optional and fine.
If the sauce breaks and looks oily, do not panic. Add another splash of starchy water and toss hard again. The starch will re-form the emulsion. This is one of the few dishes where a mistake is genuinely recoverable, because the fix is the same ingredient that made it work.
Serve immediately, in warm bowls if you have them. Aglio e olio does not hold; the emulsion tightens as it cools and the pasta goes claggy. This is a dish to eat the moment it comes off the heat, which is part of why it suits a weeknight.
Key points
- Do not rinse the pasta; the surface starch helps the sauce cling.
- Toss off the heat or over the lowest flame to protect the emulsion.
- Add pasta water in splashes and toss hard for 30 seconds.
- If the sauce breaks, more starchy water and more tossing will fix it.
Chili Flakes And Parsley At The Finish
Chili flakes are optional, and the dish is complete without them. If you want heat, add them to the warm oil with the garlic, or just before, so they bloom in the fat and release their flavor. Adding them raw at the end gives a sharper, more raw heat that some people prefer.
Watch the flakes in the pan. They are thin and burn faster than the garlic, so if your oil is running hot, add them later, when the garlic is already pale. If they turn dark brown, they will taste bitter. Pull the pan off the heat and start the flakes again.
Parsley is also optional, and it plays a different role: freshness and color against the richness of the oil. Stir it in at the very end, off the heat, so it stays green and bright. Cooked parsley loses its color and its lift, so it belongs in the last ten seconds, not the first ten minutes.
Flat-leaf parsley is the usual choice, chopped fairly fine. If you have only curly parsley, it works, but chop it smaller because the leaves are tougher. Either way, add it to taste; there is no fixed amount, and the dish is fine without it.
The finishing touches are where you adjust the dish to your own taste, not where you follow a rule. Some cooks like a lot of chili; some like none. Some want parsley for the color; some leave it out. The core of the dish, garlic, oil and pasta, is already done.
A final taste is the real finishing step. Check the salt, check the heat, check that the sauce still looks glossy. If it has tightened while you were chopping parsley, a last splash of pasta water and a quick toss brings it back. Then serve.
What you are aiming for on the plate: pasta that is coated, not drowned; garlic that is soft and sweet, not crisp and bitter; a sauce that looks creamy even though there is no cream in it. That is the whole dish, and it took about 15 minutes from the boil.
Key points
- Chili flakes are optional; bloom them in the warm oil for flavor.
- Add flakes late if the pan is hot, since they burn faster than garlic.
- Stir parsley in off the heat so it stays green and fresh.
- Taste for salt and gloss before the pasta leaves the pan.
Where The 15 Minutes Actually Goes
A realistic sequence, starting from a full boil: 0 to 2 minutes, slice the garlic and confirm the water is rolling. 2 to 10 minutes, cook the pasta in the salted water, stirring early. Around 8 to 10 minutes, warm the garlic in the oil over low heat. 10 to 13 minutes, reserve the water, drain and toss.
13 to 15 minutes, finish with chili and parsley and serve.
Notice that the garlic warming overlaps with the pasta cooking. That overlap is what makes the timeline work. You are not doing one thing after another; you are running two short tasks in parallel. The garlic takes 2 to 3 minutes, the pasta 8 to 10, so the garlic goes in when the pasta is about halfway done.
The pasta cooking time is the variable you cannot fully control, because it depends on the shape and the brand. Check the package for the suggested time and start tasting a minute before it. Pasta should be tender with a little resistance at the center, and that window is narrow. Overcooked pasta will not hold the sauce.
If your water is slow to boil, the whole schedule shifts, and that is fine. The 15 minutes is a target for the cooking window, not a guarantee from a cold stove. Start the water first, prep while it heats, and the rest of the sequence stays the same.
The most common mistakes all come back to timing. Garlic that browns because it went into hot oil. Pasta that is drained before the water is reserved. Sauce that breaks because the pan was too hot or the tossing too gentle. None of these are about skill; they are about order and attention.
The dish also depends on your ingredients in a way that technique cannot fix. A tired clove and a flat oil will taste tired and flat no matter how carefully you warm them. Buy firm garlic and an oil you actually like the taste of, because you will taste it plainly here.
So the honest summary of the 15 minutes: it is achievable, it is mostly waiting for water and pasta, and the part that decides the result is two or three minutes of attention at the pan. Get those right and the dish is reliable. Get them wrong and it is still edible, just not what you wanted.
Key points
- Overlap the garlic warming with the pasta cooking to save time.
- Taste the pasta a minute before the package time suggests.
- Most failures are timing and order, not lack of skill.
- Ingredient quality carries flavor that technique cannot add.
Words To Know
- Emulsion: a stable mix of oil and water held together by an emulsifier.
- Emulsifier: a substance, here starch, that keeps oil droplets from merging.
- Starchy pasta water: cloudy cooking water whose starch binds the sauce.
- Allicin: a pungent compound released when garlic cells are crushed.
- Bloom: to warm a spice in fat so its flavor releases.
- Al dente: pasta cooked tender but still firm at the center.
One Useful Takeaway For The Next Meal
Before you drain the pasta next time, scoop out two cups of the cooking water into a mug and set it by the stove. Then build the sauce with a splash at a time, tossing hard, and watch for the moment it turns glossy and coats the back of a spoon.
That single habit, reserving more water than you think you need, is what turns oily pasta into a sauce.